
Some general information about loads, charging systems, and battery capacity can be found in the Electrical Project Notes web page.
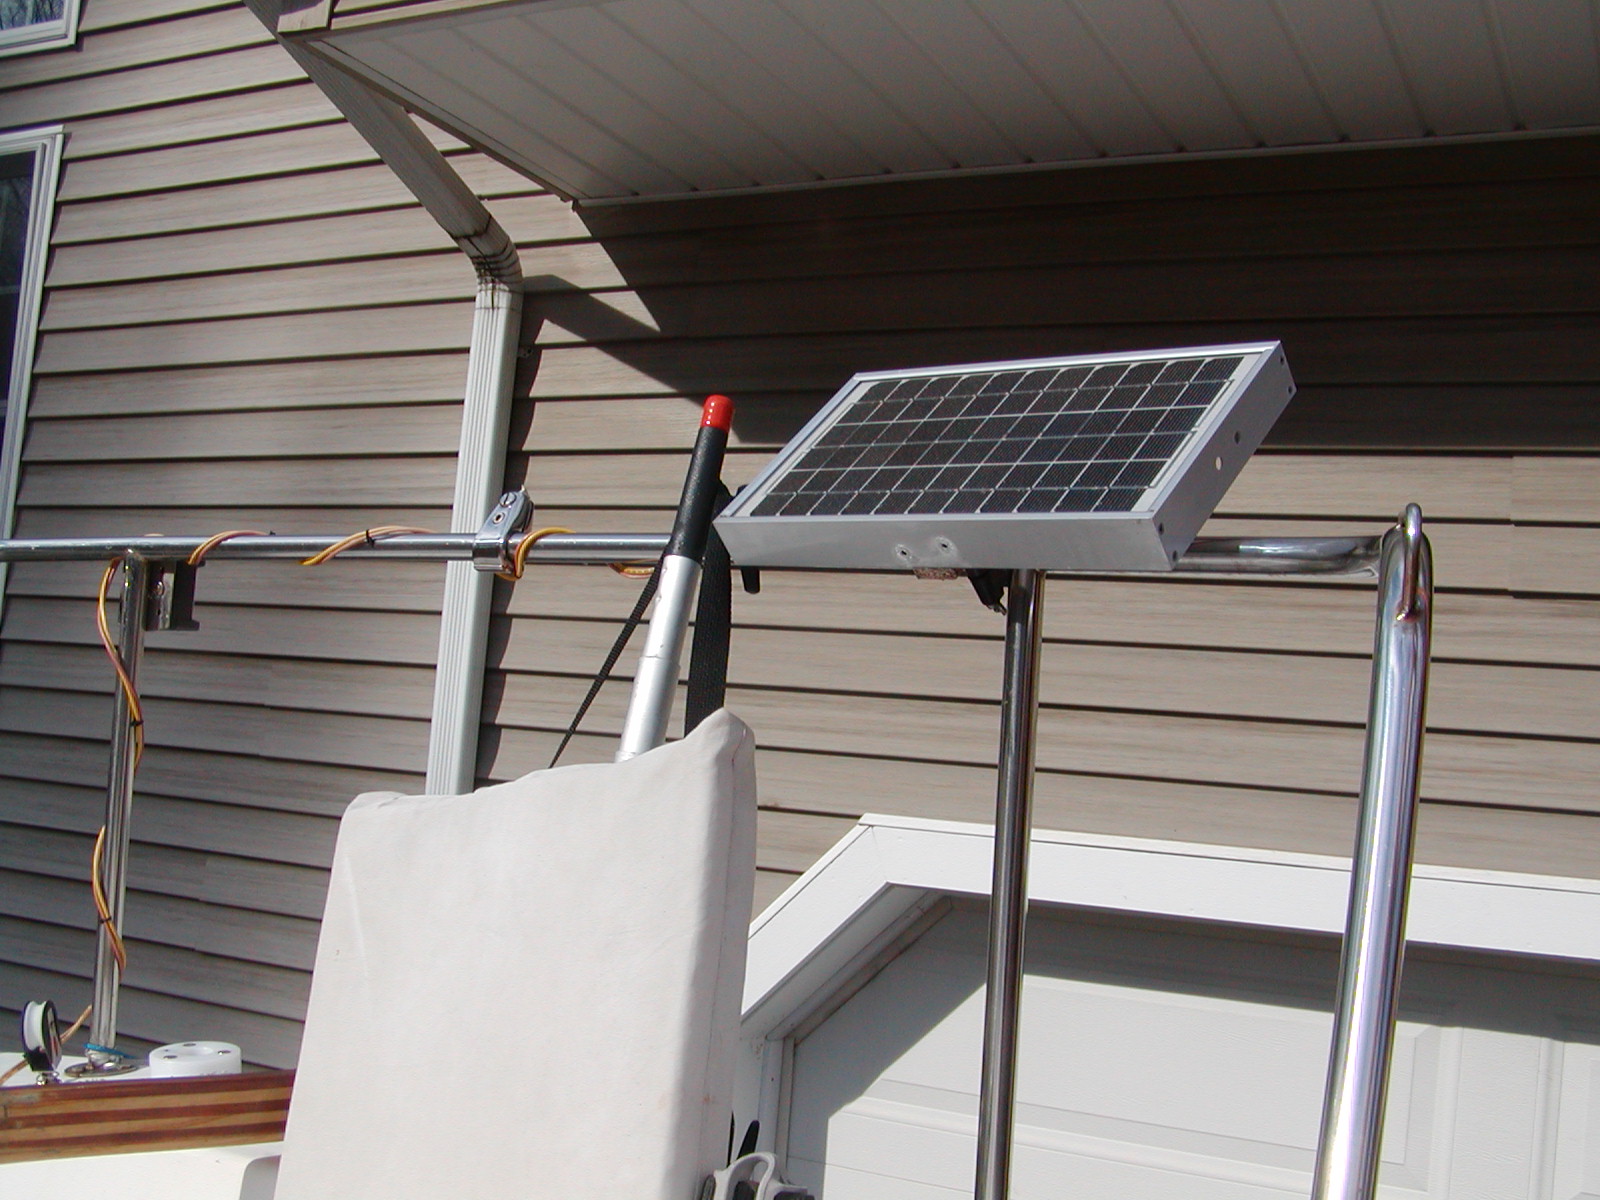
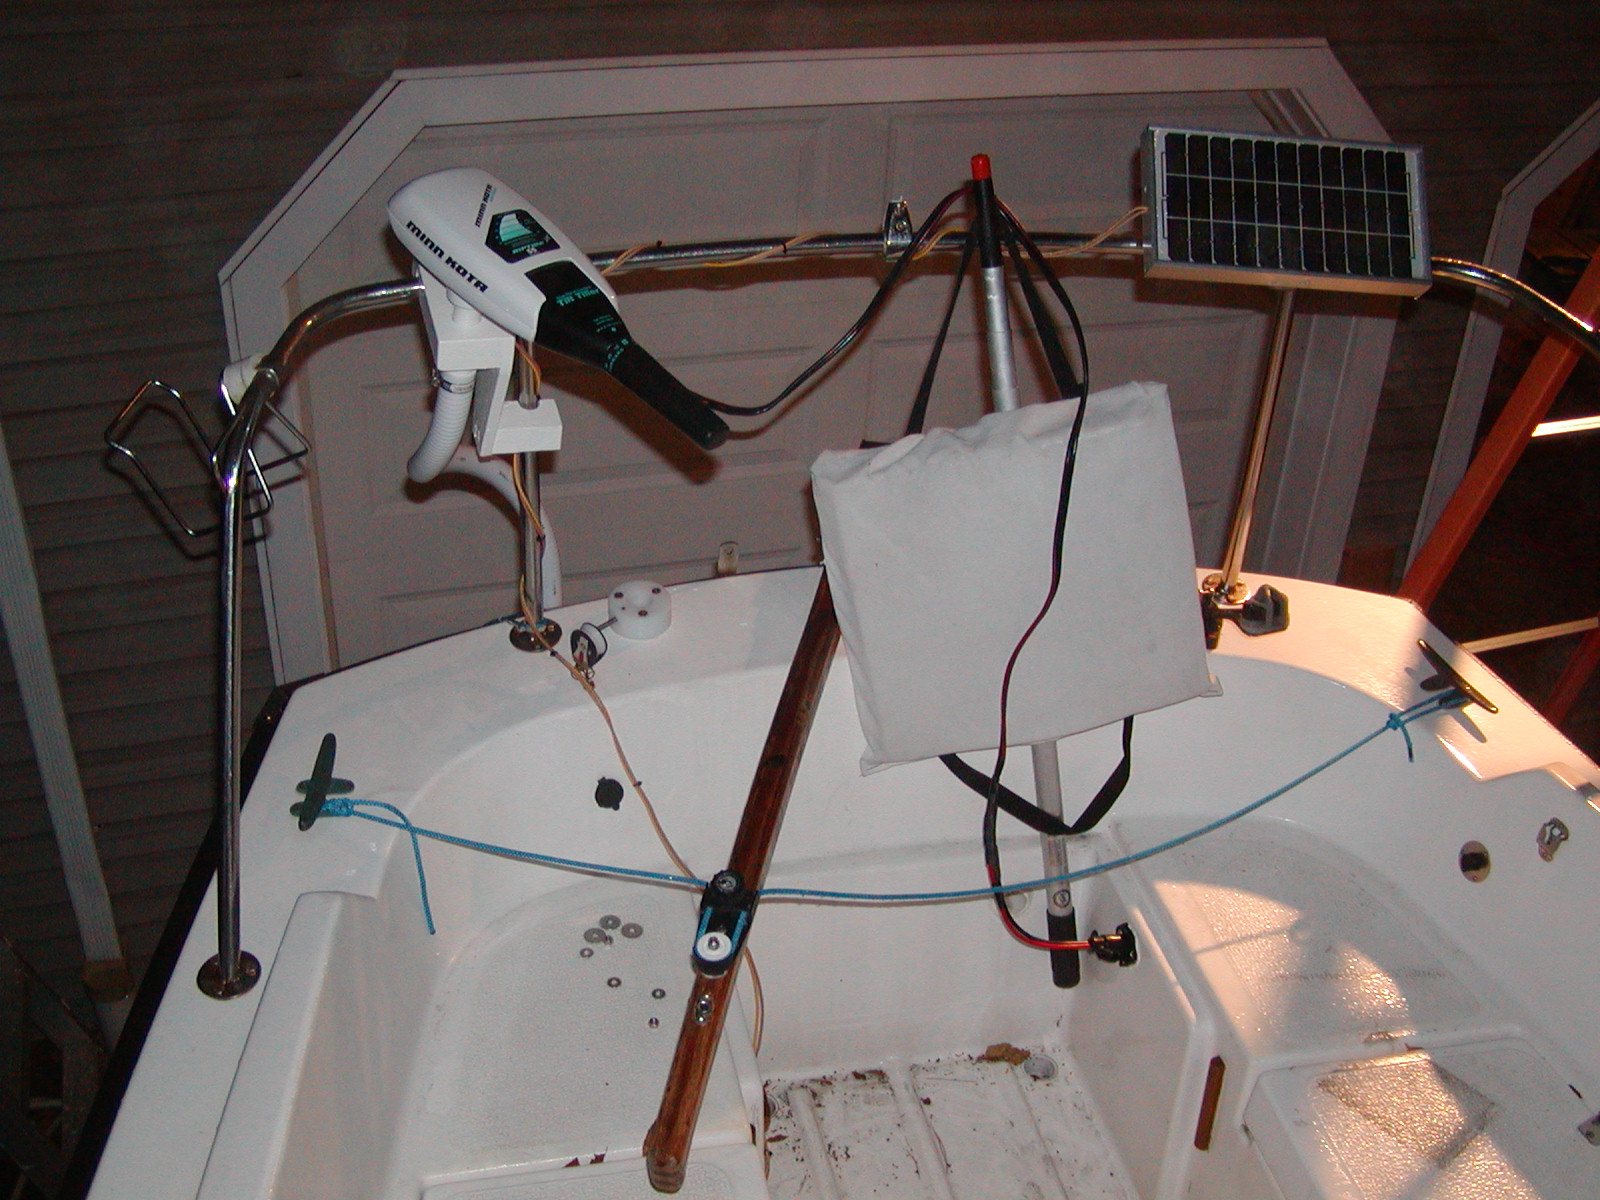
So far a 6 Watt, 13"L x 6.9"W panel for $79.99 was purchased due to its small size, low cost, and high efficiency. For 2 or 3 seasons it was mounted on a stancion using wing nuts to make it easily removed. In 2005 after the outboard was sold the solar panel was moved to the stern rail where the outboard used to be.
The 6W solar panel does an excellent job of providing float charging and recharging the small drain on the battery that results from occasionally using the navigation and cabin lights for a few hours at a time. Trying to disconnect the solar panel to avoid overcharging may have helped kill a battery. We have a charge controller now. This small solar panel by itself is not enough to recover the charge taken out by even a single overnight sail. For that we'd have to use the water towed generator.
As electronics is added and charging needs grow, one or more larger solar panels will be added at a later time. Finding (or building) a place to mount larger solar panels remains the big problem.

A Flexcharge NCD25A-12 charge controller was purchased in early 2004 to control the charging of the house battery bank. This is a 25A 12V charge controller with load divert option. It was installed in fall of 2004 but so far has not been used with the new battery. In the winter of 2005 it was remounted to a new location and wired to the 6W solar panel. That spring it failed, just prior to the two year warentee expiring. A new one was provided for free by West Marine who even covered shipping costs.
Flexcharge made two installation suggestions while I had them on the phone about the warentee return. Before using the water towed generator I should add a dummy load to the divert side to avoid damage due to a surge caused by switching the generator to an open circuit. When installing or working with the wiring connect ground first, then battery side, then charging side and disconnect in the opposite order. Newer models are less sensitive to this.

This time in the build or buy decision we went with "buy" and got a Blue Seas battery box for our 8D battery. The battery box was mounted on sliding rails under the companionway stairs pushed as far back as it will go leaving a little space for the bilge pump hoses. After pushing it back, two lag bolts are used (finger tightenned) to make sure the battery can't slide fore and aft if the boat was pitching.
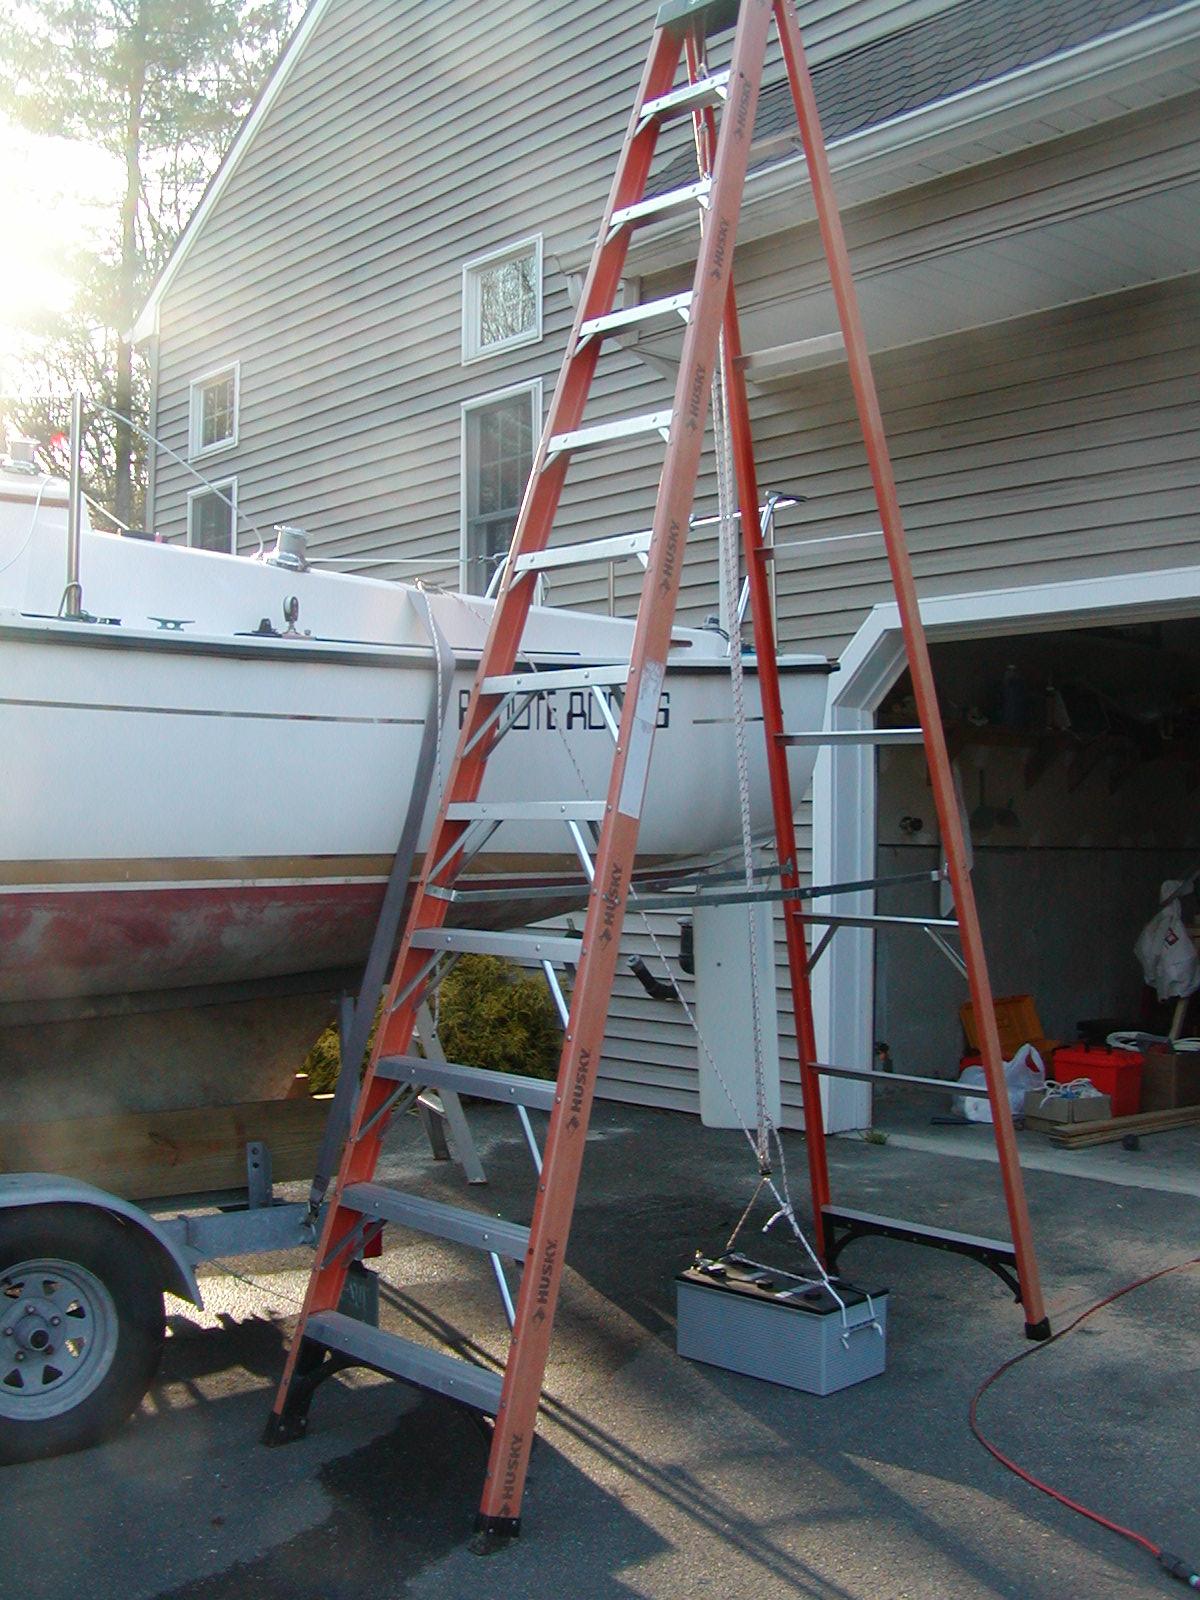
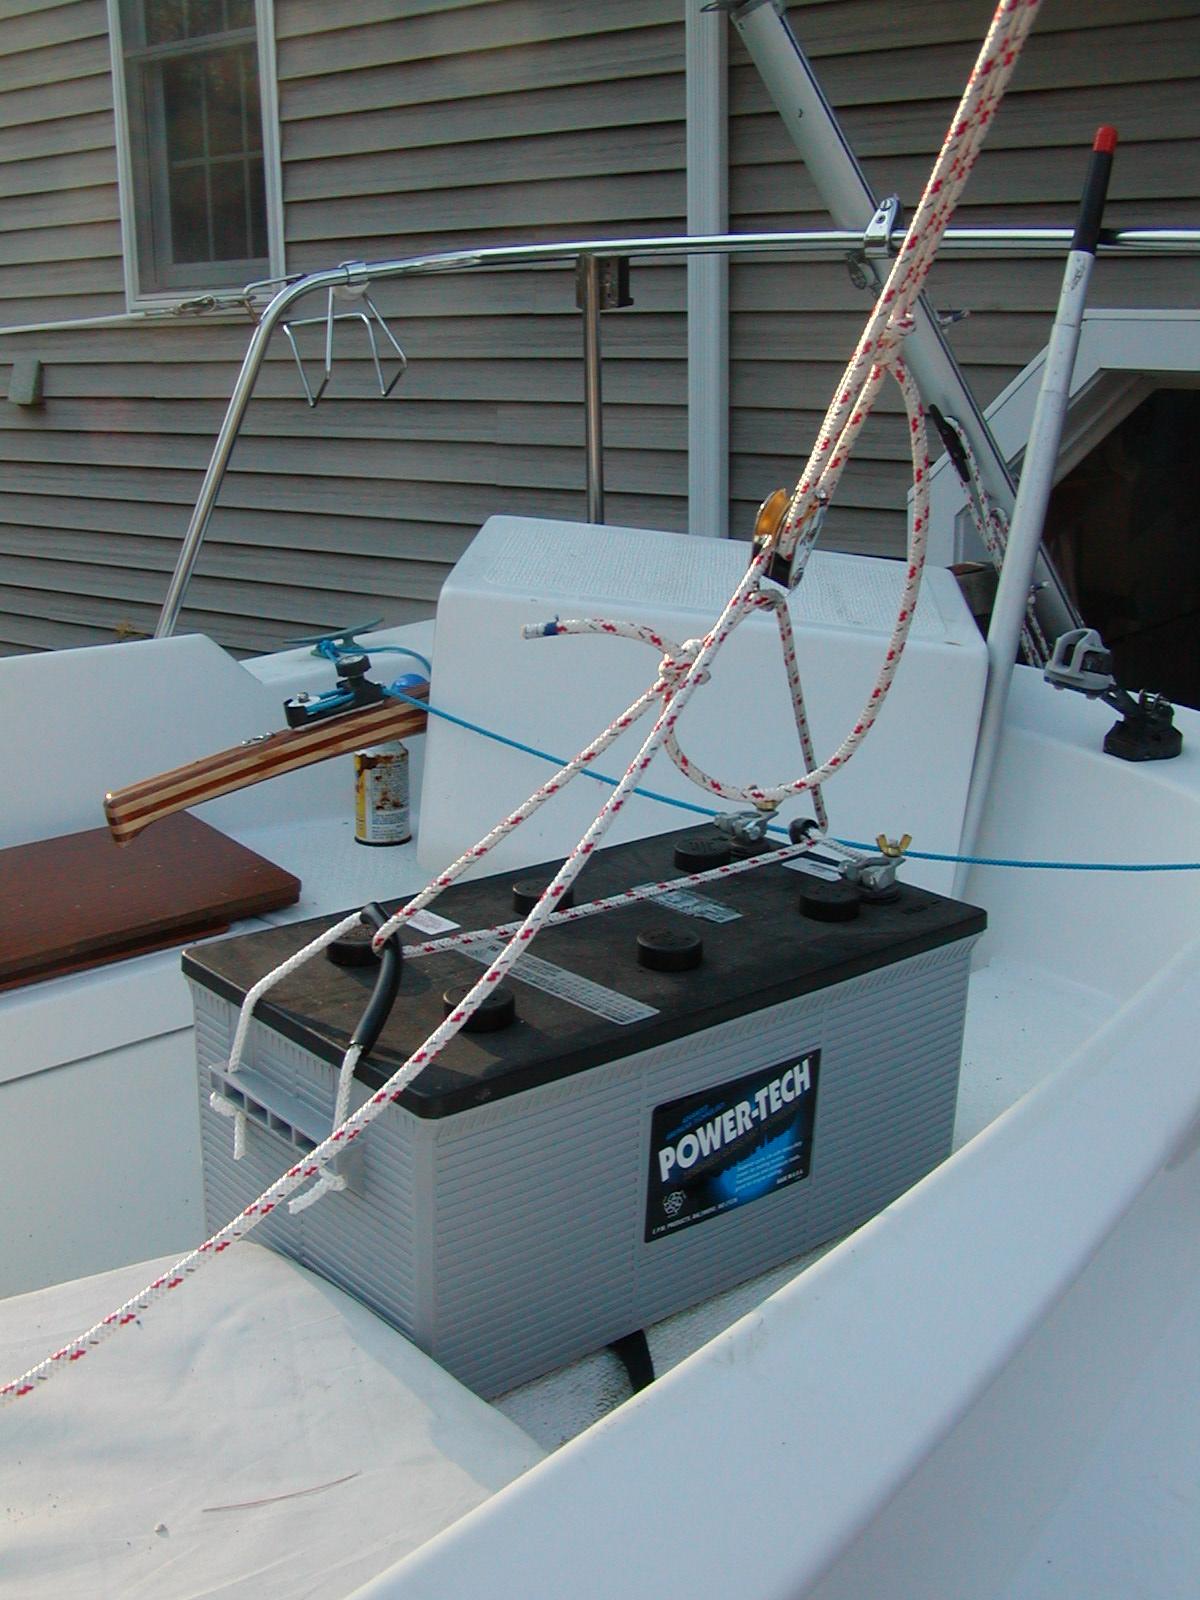
Defender had only one 8D AGM battery when I stopped by. They carry Concord but did not have the Lifeline in the 8D. I went with the slightly less expensive PowerTech 8D. These things are very heavy at 160 lbs and quite a chore to move around. Just getting it on the boat was difficult.
To get the battery onboard I used a 4:1 tackle and a 12 foot ladder. Once in the cockpit getting it into the cabin, then into the box and into place wasn't bad. As mounted the battery box top can be raised about 4-5 inches to connect the battery after the box is secured in place.
A 255 AH battery may seem to be overkill for so small a boat. However batteries should never be drawn down below 50% of their charge and if they are should be recharged promptly. A single overnight sail would bring a 100AH battery to as low as 60%. A cloudy day and another overnight would be bad for the battery. The same is true for consecutive nights with the anchor light with cloudy days. This will also be a more appropriate battery size if any significant loads (and charging source) are added. For example, adding a small wind generator might provide adequate charging (seldom is there both no wind and no sun) to add very small refrigeration.
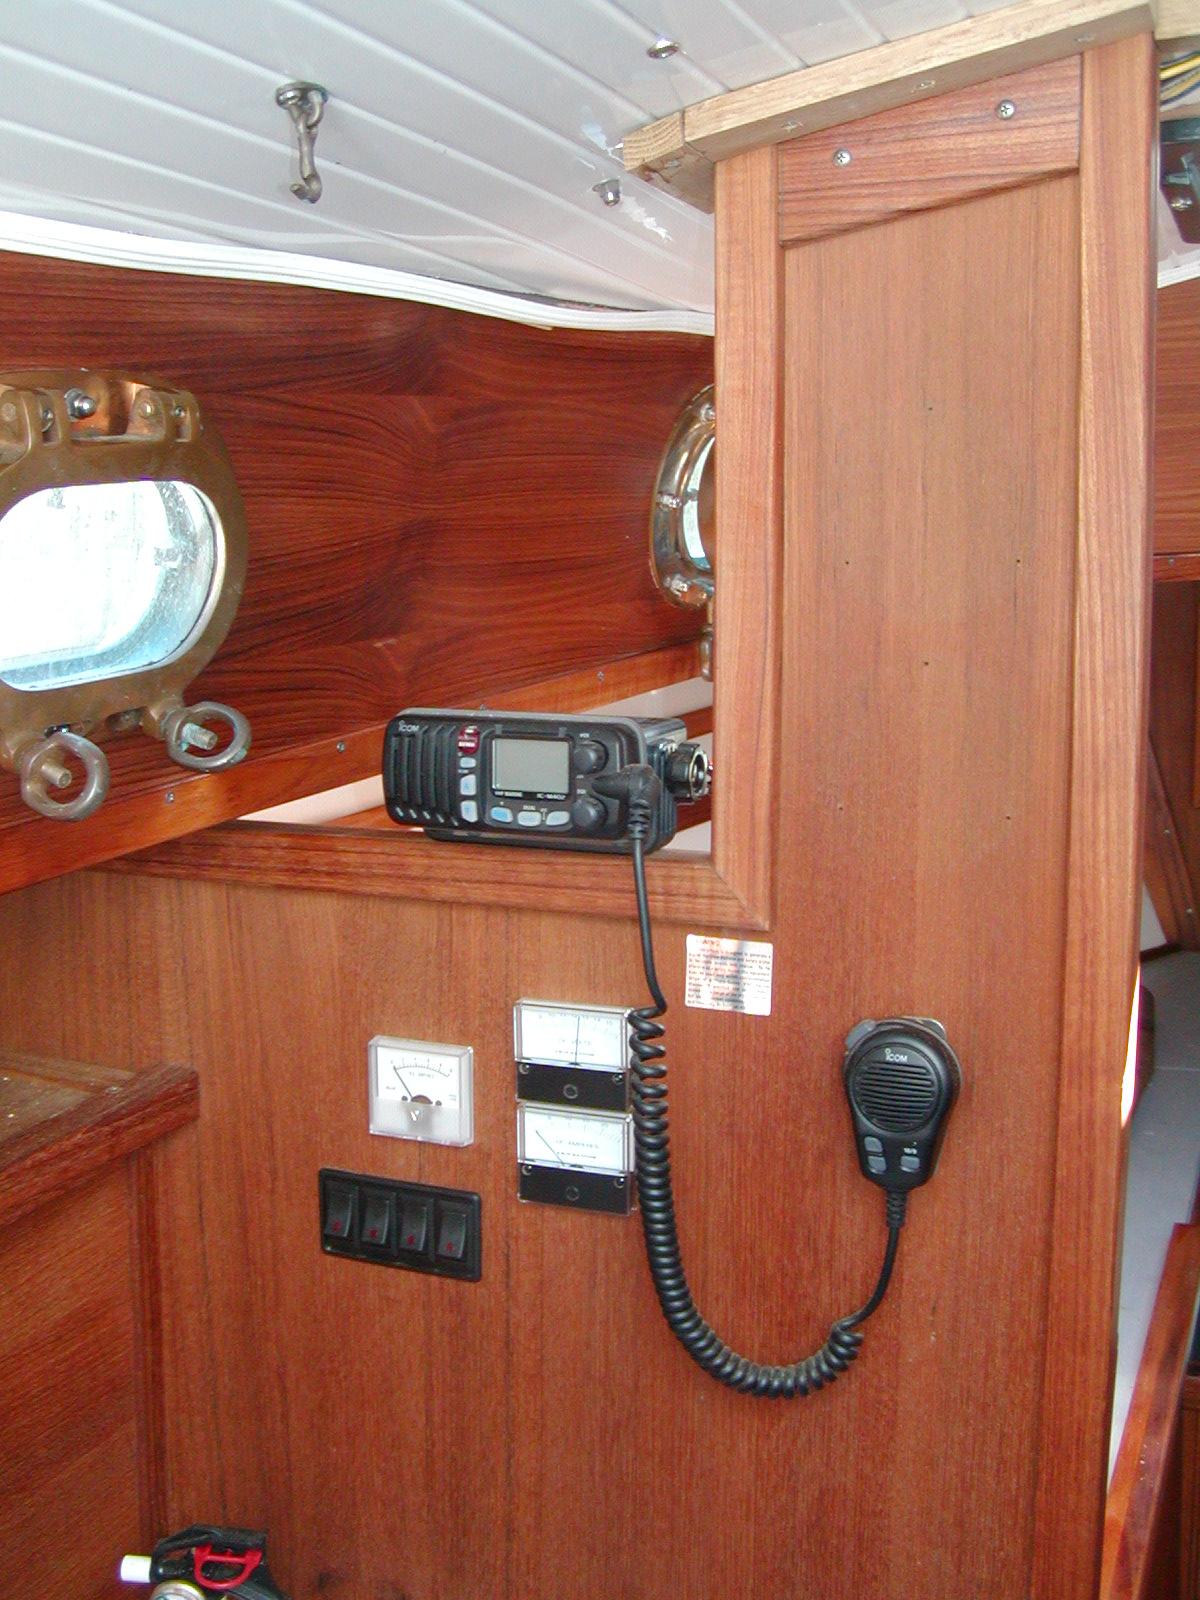
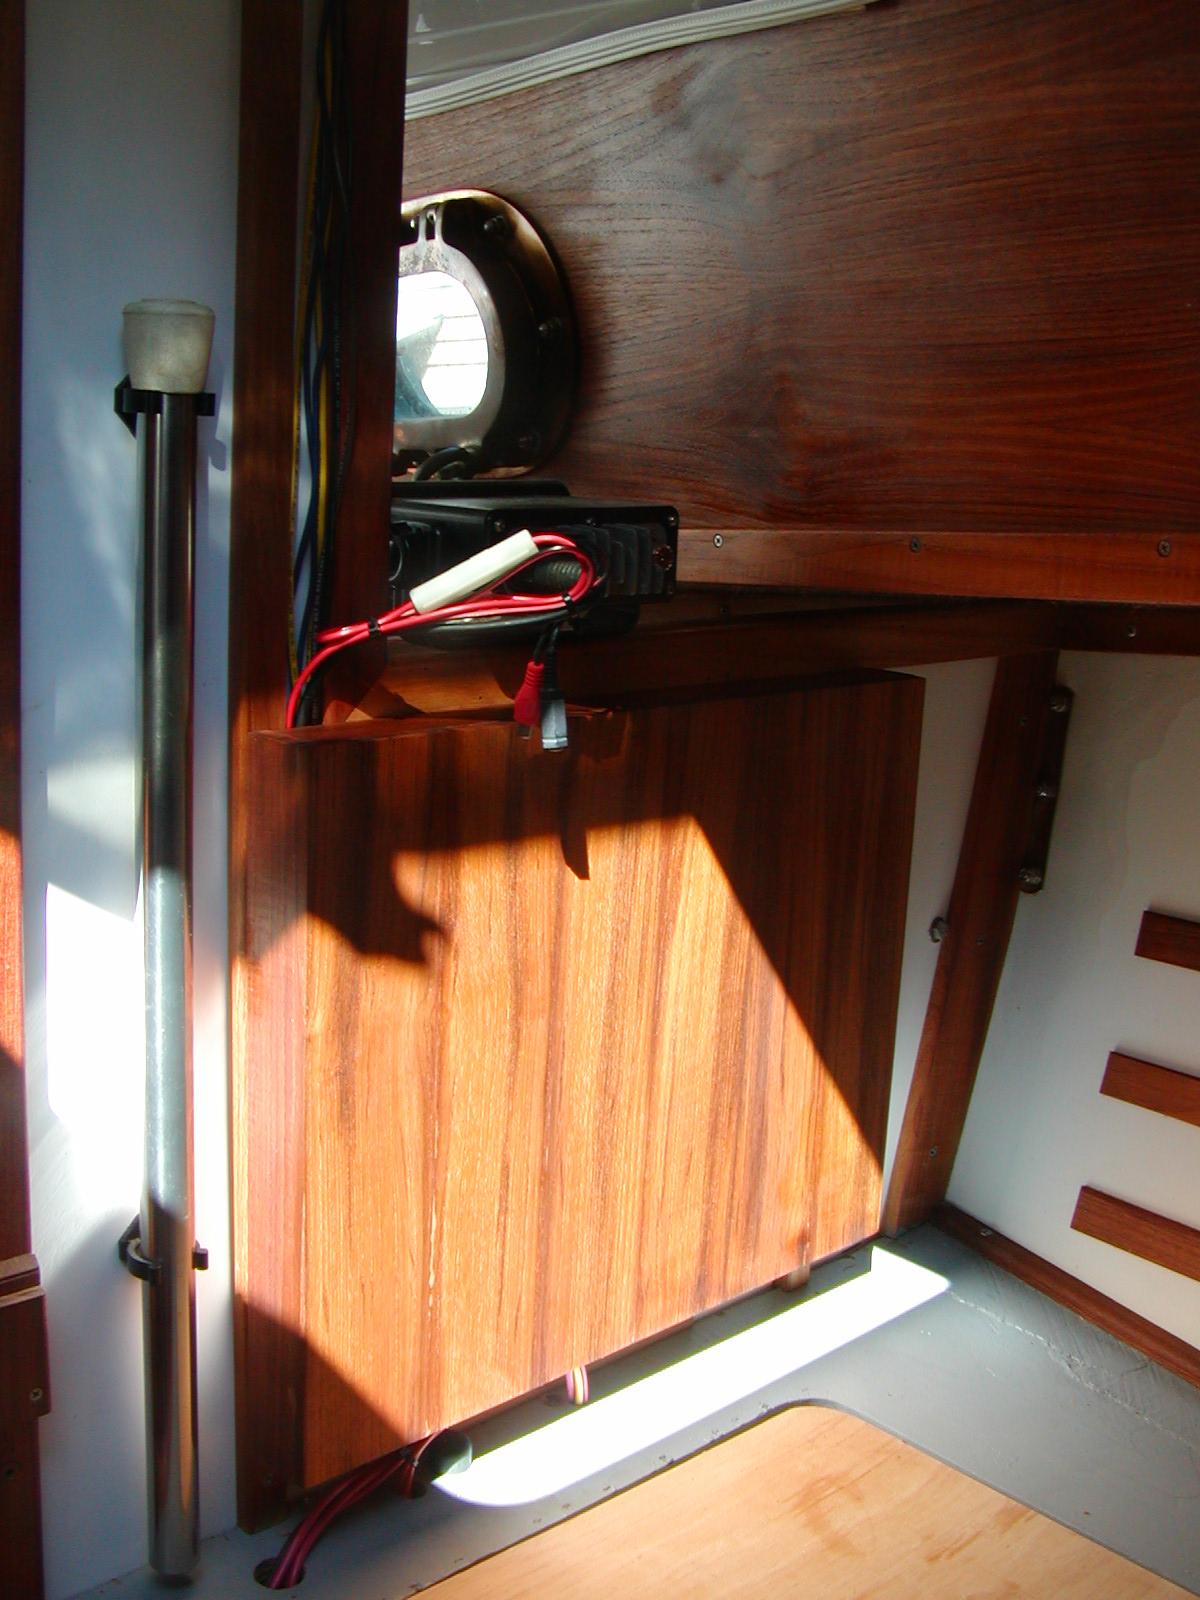
The voltmeter is always on. It is separately fused and connected directly to the battery. It draws 50mA and therefore 0.12 AH per day. There are currently two ammeters.
The 10A meter is connected to the load side, excluding the heavy hitters, the inverter and the trolling motor. Those heavy loads would suffer from bringing the wiring forward and then back, however it may be possible to mount a separate shunt resistor directly in the path and put a 100A meter in the cabin (the wiring for these is essentially just bringing a voltage drop back to the meter, not the full load.
The 25A meter covers all charging sources. Here it would be better to have a pair of 10A or 15A meters, one for solar panels and one for the water towed generator (and later the wind generator if we get one). The 25A meter can probably be read to within 1/2 AMP.
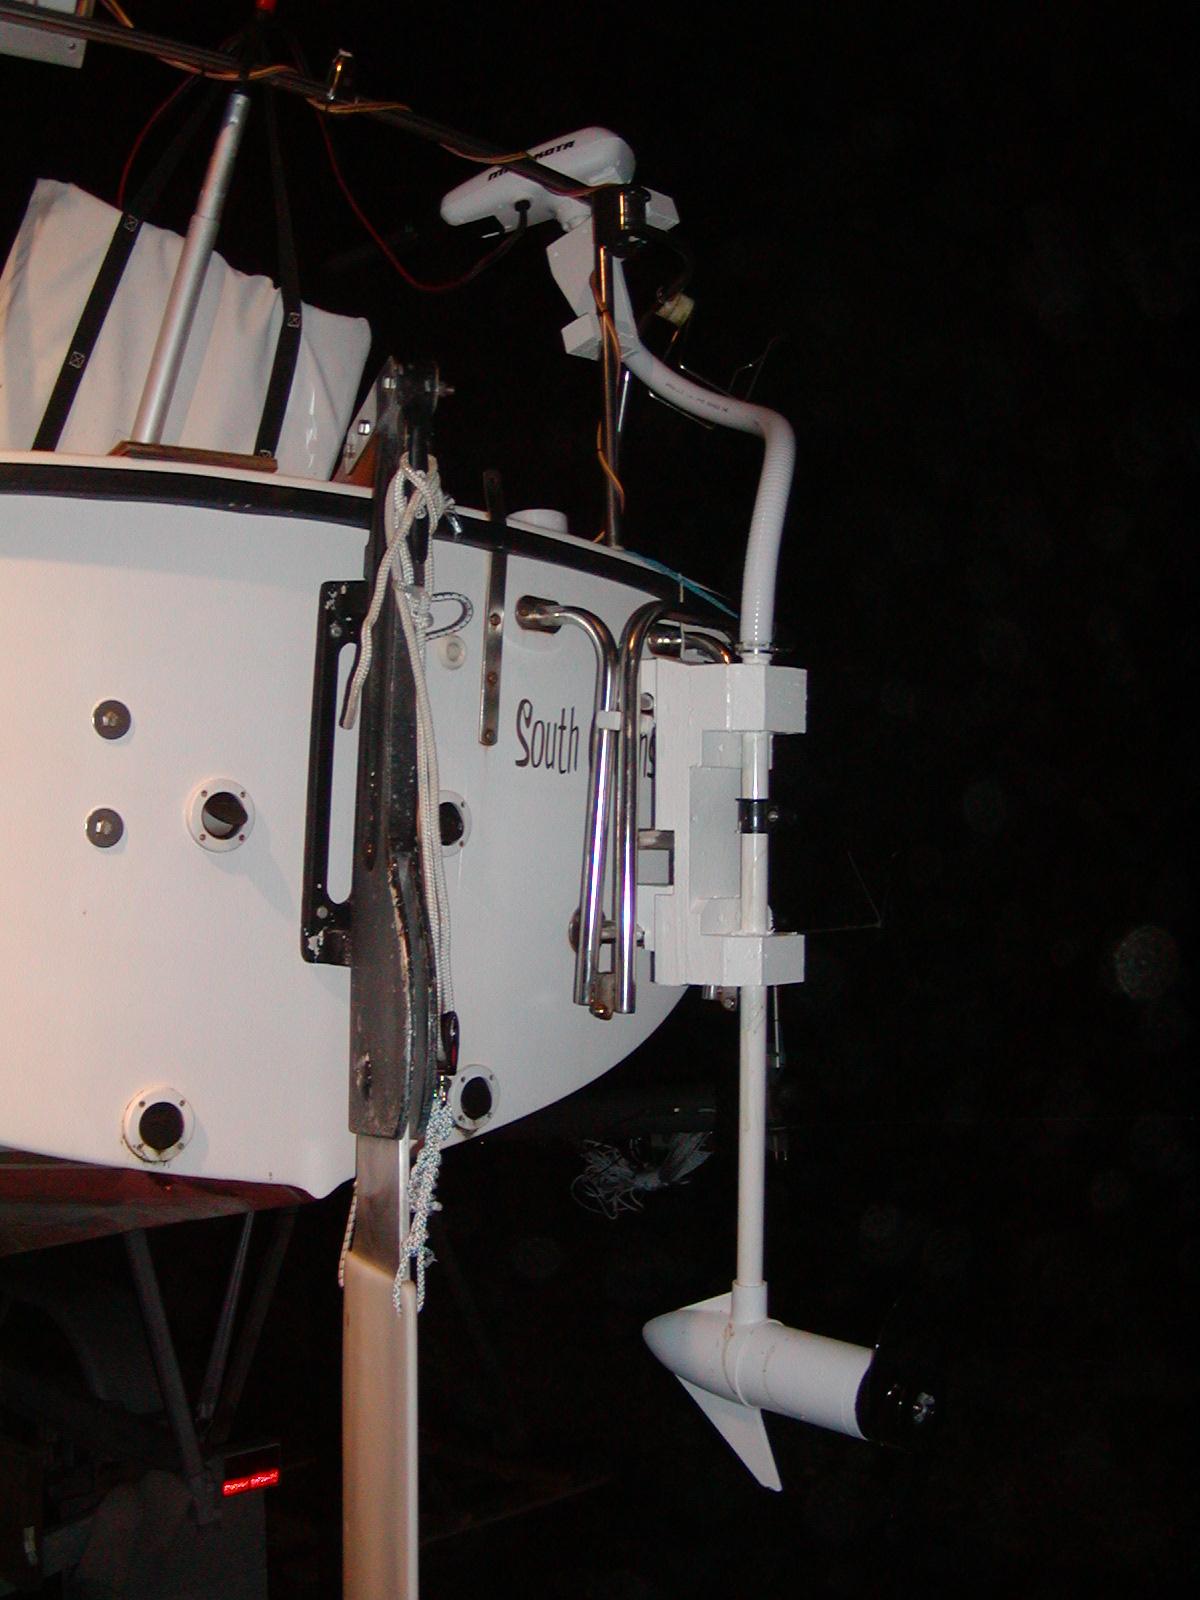
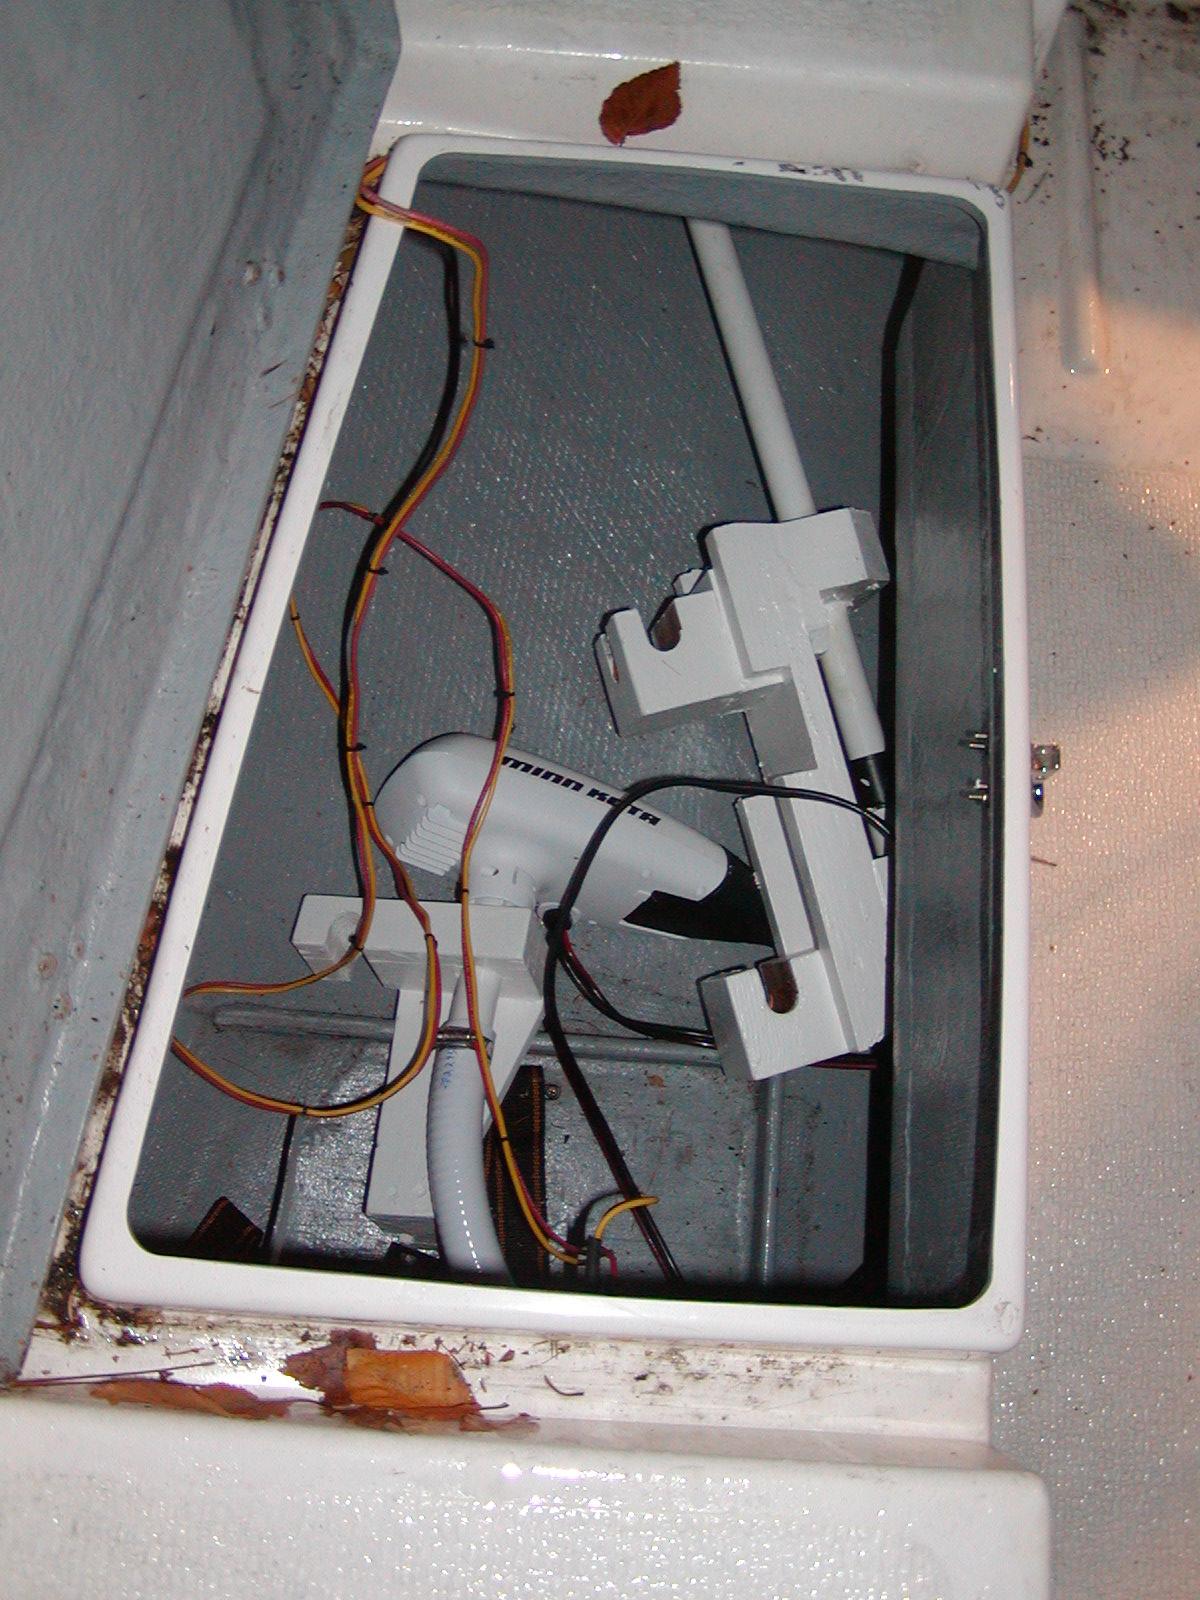
These photos were taken at night just after the mounting was finished. The control head was removed from the top of the fiberglass tube and the fiberglass tube and the wires were cut. The wires were extended to allow a length of 1-1/8 white hose to be added. Wooden mounts, painted white with enamel paint, were added to both sections of fiberglass tube. The top section of about 6" of tube and the control head fits on the stern pulpit. The remaining fiberglass tube and the trolling motor itself mounts on the boarding ladder. Since this motor is not heavy, it can easily be removed and stored in a cockpit locker.
NEED PHOTO
A water towed generator seems like the best way to get moderate charge capacity under sail. The Ferris Power Products 10A water towed generator is rated at 0.5A at 2 knots, 5A at 4 knots, and 10A at 8 knots. These ratings are acheived with the battery at 50% charge.
Under normal conditions, 24 hours or less of sailing should bring the 255AH battery up to very near full charge from 50% discharged even considering the current drain of the loads we now have on board. Where the water towed generator is of no use is at anchor. It also cannot be used in very shallow water or small inland waterways. This is where solar panels or a wind generator become the only charging source, neither of which are installed at the time of writing, other than a 6W solar panel used for float charging.
![]() Previous Page: New Electronics
Previous Page: New Electronics
![]() Next Page: Mooring, docking, and anchoring
Next Page: Mooring, docking, and anchoring
![]()